Have you experienced the Clicking Problem with your Yanmar GM series marine diesel engine? Does the starter motor not always turn on the first attempt of pushing the button or turning the key? If so, you may have experienced a common fault where corrosion in the wiring loom or switch is creating a voltage drop on your cranking current sufficient to stop the starting circuit operating.
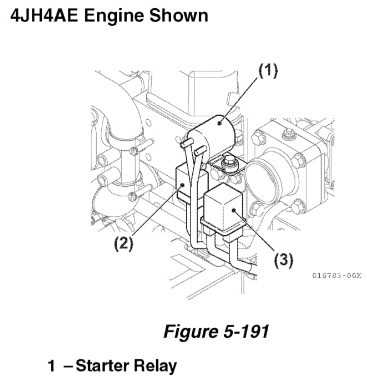
Yanmar, in a rare lapse of engineering wisdom, chose to route ALL the current for the starter solenoid, for several of their marine diesel engines, through the control panel. Over time, a bit of corrosion at the wiring harness connections (or within the key-switch itself) tends to occur. The result is voltage drop across the harness to the extent that sometimes there isn’t enough current in the wiring to throw the solenoid and start the engine. Later engines, such as the 4JH4AE, used a close-coupled relay on the starter motor to prevent this.
Cleaning or Replacing the wiring harness to achieve better starting
Cleaning all the contacts, or replacing the solenoid wire, will keep you going for a while. A simple fix is to replace the harness with a replacement from Yanmar.
The harness, compatible with a number of Yanmar Marine Diesel models including 1GM, 2GM, 3GM (F)(D), 2GM20 (only on engines before serial # E21167) and 3GM30 (only on engines before serial # E14020) has the manufacturer’s part number of 370-128270-77921, an updated part number from the original.
Installation is relatively simple, with all connection points located on the port side of the engine.
The approach taken in the video was to begin at the back and work forward, disconnecting the old harness and connecting the corresponding wires of the new harness. Watch the fitting of a new harness on the video below. The steps taken are outlined;
- Start with the connectors leading to the engine control panel. (5:48)
- Followed that with the ground and harness clamp at the engine mount. (6:46)
- After that, connect the tachometer sender (8:56) before moving forward on the engine.
- Connected the starter motor next. (9:54)
- Next, connect the alternator and voltage sender/charge lamp. (14:29)
- Finally, connect the temperature and pressure sensors. (16:47)

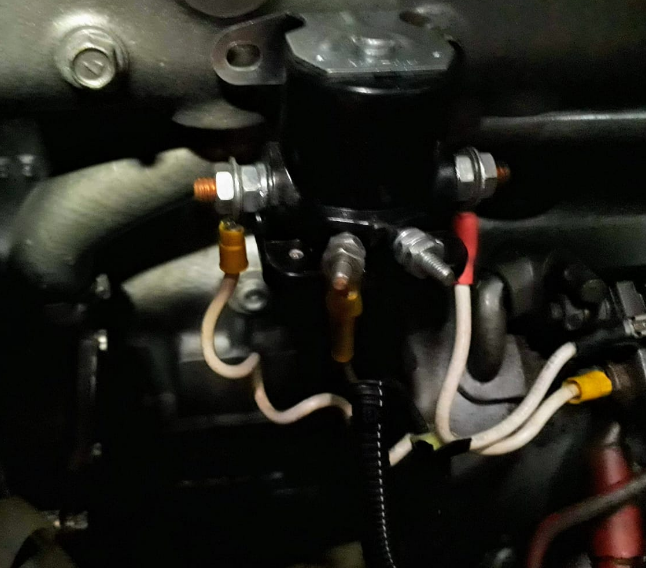
Fitting a starter circuit relay to a Yanmar GM Series Engine
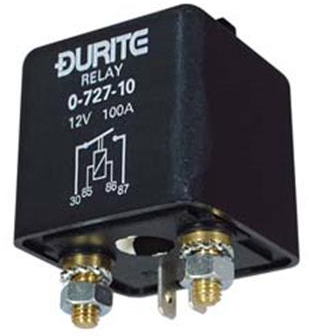
A more complicated, but more permanent fix is to place a small 12v relay close to the starter motor, so that the key-switch only has to drive the relay, not the entire solenoid current. Any generic 40A (or better) auto relay will work. They are not expensive as they are generic parts.
The correct relay will have four terminals numbered 85, 86, 30 and 87.
Make up a length of cable from the large screw on the solenoid (battery cable terminal) and connect this to #30. Remove white cable from small solenoid terminal and connect to #85.
Make up cable from #86 connect to engine block. Connect #87 to small termimal on solenoid.
#85 & #86 actuate the relay and #30 & #87 power the solenoid.